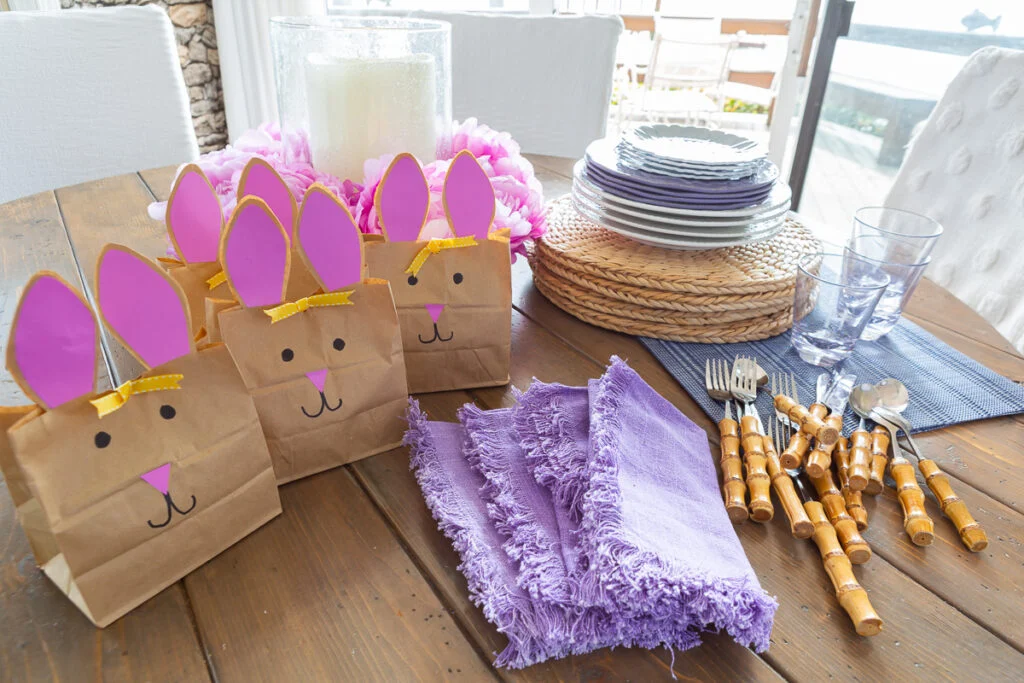
Looking for a creative alternative to traditional Easter baskets or a charming addition to your table decor? Dive into the world of DIY with our easy-to-follow guide on crafting adorable paper bag Easter bunnies. These sweet creations not only add a touch of whimsy to your festivities but also serve as delightful vessels for holding Easter goodies and treats. Plus, with just a few simple supplies, you can embark on this fun project with ease, making it suitable for young children and kids of all ages.
What You’ll Need To Make DIY Paper Bag Easter Bunny:
- Brown or white paper bag (lunch bags work perfectly)
- Ribbon or twine for decoration
- Marker (such as a Sharpie)
- Paper shred or Easter basket filler grass
- Optional: Buttons, cotton balls, or pompoms for the nose
- Scissors
- Glue (or hot glue) if opting for a button or pompom nose
Source: https://mostlovelythings.com/https-mostlovelythings-com-paper-bag-bunny/
Crafting Steps:
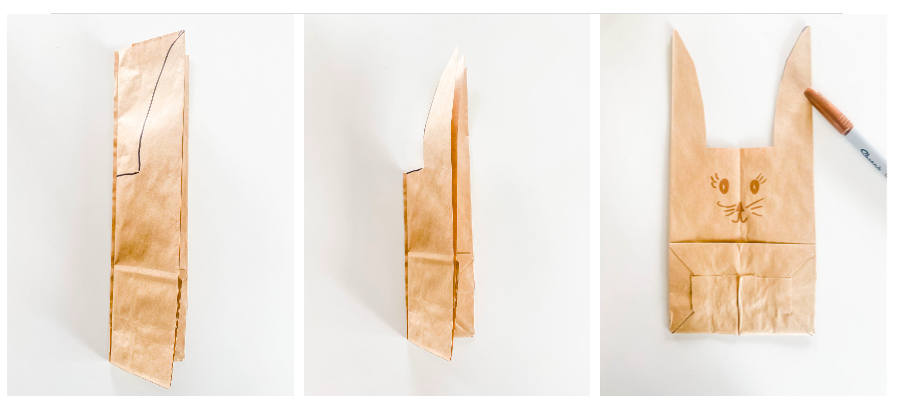
- Begin by folding the paper bag lengthwise, ensuring the flap is tucked inside.
- With the folded sides of the bag to your left, draw a straight line approximately 4 inches from the top, extending it about 1 inch in length. Then, from that point, draw a line upwards to the tip of the bag on the right.
- Carefully cut along the lines and open up the bag to reveal the bunny ears.
- Using your marker, draw a cute face just above the bottom flap of the bag.
- If desired, attach a button, cotton ball, or pompom as the bunny’s nose using glue.
- Fill the bag with paper shred or Easter grass to provide a cozy nest for your treats.
- Add your chosen Easter goodies to the bag.
- Finally, tie the bunny’s ears together with small pieces of ribbon or twine to complete the look.
With these simple steps, you’ll have a charming collection of paper bag Easter bunnies ready to delight both young and old alike. Get creative and enjoy the joyous spirit of Easter with this fun and easy craft project!
Read the full article here


