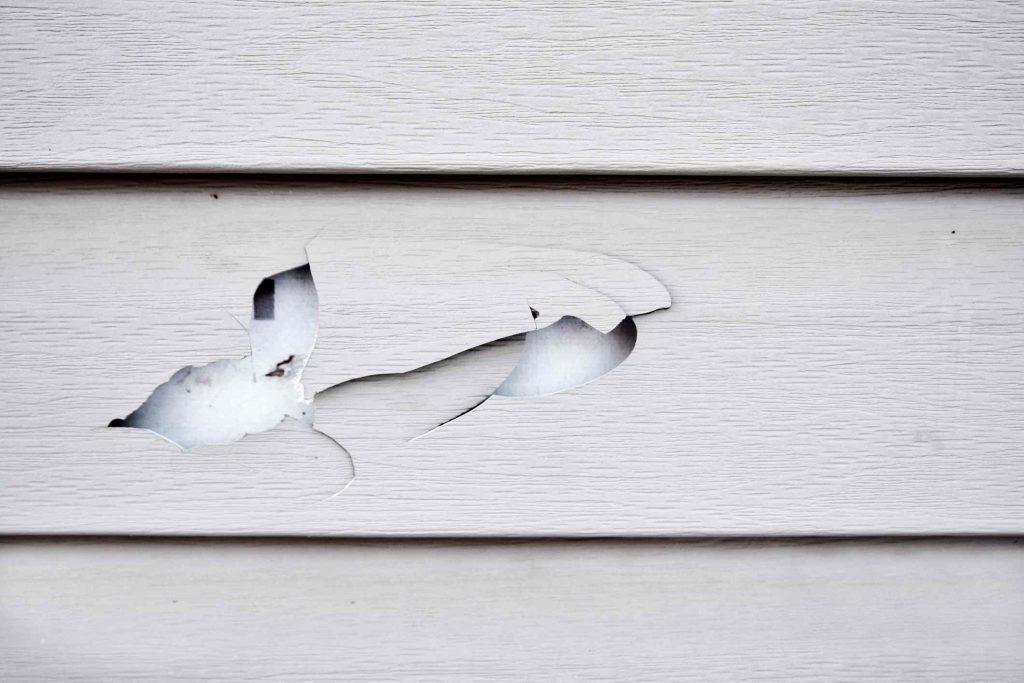
Vinyl siding is durable and long-lasting but can get cracked or damaged. The easiest way to remove or replace damaged vinyl siding is to use a vinyl siding removal tool. Using a vinyl siding removal tool allows you to get under the top and bottom edges of the vinyl siding pieces where they interlock (a design that allows them to resist wind and moisture). Most importantly, by using this tool you won’t damage the siding in the process.
What Is a Vinyl Siding Removal Tool?
A vinyl siding removal tool, commonly called a zip tool, is an indispensable tool, little more than a metal bar with a small hook at one end and a bend at just the right angle. A zip tool separates vinyl siding’s hidden joints that lock the pieces together.
The best vinyl siding removal tools are made of metal and have a high-quality non-slip grip. Aluminum-coated tools edge out steel tools since they’re UV coated. UV coating improves the aesthetics of metal, makes them more scratch-resistant, and protects them against wear and heavy use. You can get vinyl siding removal tools from big-box home improvement stores like Home Depot, Lowes, or Menards; hardware stores; or department stores that sell tools like Walmart. You can also find them sold via online retailers and suppliers like Amazon.
Removing and Fixing Vinyl Siding
Vinyl siding panels are interlocked at their top and bottom edges via J-shaped channels called buttlocks. Each panel overlaps the panel below it and locks into place along the buttlock joint.
Use the zip tool to release the buttlock at the top and bottom of the piece you want to remove. A zip tool makes it easy to remove a piece of vinyl siding from any place and start from the bottom if needed.
If a piece of siding loosens, snap the loose edge back into place. If a siding panel blows off, you can reattach it by inserting the hook of the zip tool into the buttlock of a panel you want to snap back into place.
Installing Vinyl Siding
Installing a replacement piece of vinyl siding is the reverse of removing the damaged panel. First, you nail up the new piece, driving nails through the slots in the nail hem, then you connect the buttlocks with the zip tool.
Other handy tools for installing vinyl siding include a snap lock punch to punch lugs in cut edges of siding and a nail hole slot punch to elongate a nail hem slot to allow for nail movement. You’ll also need special scissors to cut through siding, like cutting snips or siding shears, and a utility knife or scoring tool.
When replacing vinyl siding, it can be difficult to find matching material because siding manufacturers regularly change offerings and discontinue older styles and colors. It’s best to save some spare material from the original siding installation. If you cannot find an exact match, take the damaged piece to a siding distributor and ask for the closest match.
What You’ll Need
Equipment / Tools
- Zip tool
- Flat pry bar
- Wood blocks
- Hammer
Materials
- Replacement siding (as needed)
- 1 1/4-inch roofing nails (as needed)
Instructions
How to Use a Vinyl Siding Removal Tool
-
Unlock the Bottom Joint
Starting at the bottom edge of the damaged siding panel, wiggle the curved tip of the zip tool blade under a loose spot at one end of the panel, hooking the tool onto the back lip of the buttlock. Look for a slightly enlarged hole at the end of the panel, which is designed for the zip tool to slide into. Or, you can look for another loose spot along the length of the panel joint.
Separate the buttlock joint with downward pressure on the zip tool. Then, slide the tool along the length of the siding panel to release the rest of the joint.
-
Unlock the Top Joint
Repeat the same process used on the bottom joint to unlock to top joint holding the damaged panel to the panel above. Carefully lift up the bottom edge of the panel above to expose the nailing hem (and nails) on the damaged panel.
-
Pull the Nails
Use a flat pry bar and hammer to pry out all of the nails in the nailing hem of the damaged panel, then remove the siding panel.
-
Place Wood Blocks
To install a new vinyl panel, place wood blocks behind the loose panel above the area of the removed panel, to hold the upper panel away from the wall.
-
Position the New Panel
Position the replacement panel onto the wall, hooking its bottom edge over the panel below it. Push up on the new panel to snap its lower buttlock onto the panel below.
-
Nail the New Panel
Fasten the new panel by driving 1 1/4-inch roofing nails through the slots in the nailing hem, every 16 inches or so. If it’s difficult to reach the nails with a hammer, place a pry bar over the head of the nail, then strike the pry bar with a hammer to drive the nail. Leave the nail heads about 1/32 inch above the surface of the siding; this lets the siding move with expansion and contraction. Also, place the nails in the centers of the nailing hem slots to allow for side-to-side movement.
-
Lock the Panels
Secure the buttlock of the upper panel to the top edge of the new panel, using the zip tool. Grab the lip of the buttlock with the tool and pull it over the new panel’s locking edge. At the same time, use your other hand to push from the outside of the upper panel toward the wall to snap the buttlock into place. Work from one end of the new panel to the other, interlocking the entire top edge.
-
How much does it cost to remove vinyl siding? (can reference HomeAdvisor for this)
It can cost from $1,000 to $3,000, or roughly 25 cents to 75 cents per square foot, for professionals to remove the old siding, according to HomeAdvisor. This pricing includes labor and dumping fees ranging from $50 to $250.
-
What is behind vinyl siding?
Behind vinyl siding is an underlayment or a weather-resistive barrier like tar paper or Tyvek house wrap. Then, under that is sheathing, usually made of OSB (oriented strand board) or plywood.
-
What happens if water gets behind vinyl siding?
When water gets behind vinyl siding, it often leads to mold growth or rotting in the sheathing. This damage can cause mold in interior walls and affect the wall’s overall integrity.
Read the full article here


