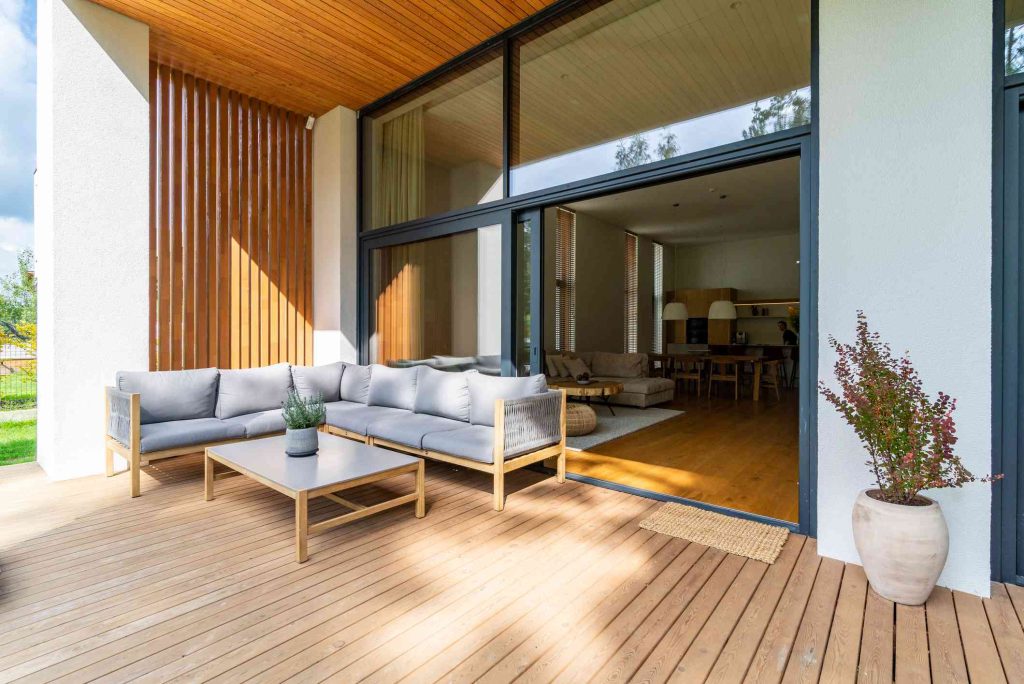
With a DIY outdoor sectional on your patio, deck, or anywhere in your backyard, you’ll have fun entertaining or just stretching out and relaxing. This outdoor sectional comfortably seats four to five people on durable, all-weather outdoor-friendly cushions in a sturdy wooden frame. Best of all, if you’re good with an electric miter saw and a drill, the entire outdoor sectional is made solely with two-by-fours and one-by-twos, and the project takes just a day or two.
Before You Begin
This outdoor sectional is composed of two pieces constructed separately: a sofa and a sectional add-on. Upon completion, they are attached with metal interlocking furniture connectors.
- Sofa: The sofa is a full-size 77-inch long wooden frame with arms on both sides. It can be used by itself if desired since it’s not dependent on the other section.
- Sectional Add-On: The sectional add-on is nearly a duplicate of the sofa. The difference is that there is no arm on the left side since the left side connects to the sofa.
This project is based on two-by-fours made of Prime Whitewood, Southern Yellow Pine, Douglas Fir, or Hem-Fir—all standard two-by-fours available at most home centers and lumber yards for $4 to $6 per piece. All need to be coated for better durability.
Cedar two-by-fours are another option for the outdoor sectional. Cedar starts with a light reddish pink color, then soon weathers to an attractive silver-gray. Imbued with natural oils, cedar does not need preservatives. Cedar costs two to three times more than the other two-by-fours.
Safety Considerations
Wear eye and breathing protection when cutting the wood with the electric saw. Use a dust containment system, as well. Observe all safety precautions when operating the electric miter saw.
What You’ll Need
Equipment / Tools
- Electric miter saw
- Drill
- Drill bits, set
- Driver bits
- Tape measure
Materials
- 17 two-by-fours, eight foot
- 11 one-by-twos, eight-foot
- 6 outdoor seat cushions, 24-inch square
- 8 pillows for the seat back
- 4 metal sectional sofa interlocking furniture connectors
- 1-inch screws, box
- 2-3/4-inch screws, box
Instructions
How to Build the Sofa Section
-
Cut List / Parts List
Cut List
With the electric miter saw, cut the two-by-fours and one-by-twos to these dimensions.
- 2 two-by-fours at 79 inches
- 2 two-by-fours at 72 inches
- 2 two-by-fours at 28-1/2 inches
- 13 two-by-fours at 25-1/2 inches
- 11 one-by-twos at 72 inches
Parts List
The cut wood produces this parts list.
Part # Lumber Length Function Quantity A Two-by-four 72 inches Seat platform front and back rails 2 B Two-by-four 25-1/2 inches Seat stringers 5 C Two-by-four 25-1/2 inches Legs 4 D Two-by-four 28-1/2 inches Armrests 2 E Two-by-four 25-1/2 inches Center brace for arm/leg unit 2 F Two-by-four 25-1/2 inches Seat platform connection brace 2 G Two-by-four 79 inches Seat back 2 H One-by-two 72 inches Seat slats 11 Build Seat Frame
- Lay the two 72-inch front and back platform rails (A) next to each other: on edge, parallel, and about 25-1/2 inches apart.
- Lay the five 25-1/2-inch stringers (B) at 90-degree angles to the long pieces.
- Place one stringer at each end.
- Space the other three stringers at equal distances between the two end stringers.
- Screw each stringer into place with 2-3/4-inch screws, for a total of four screws per stringer.
Build Arm/Leg Unit
The sofa legs and arms are consolidated in a single unit.
- Lay two 25-1/2-inch legs on edge and parallel to each other and about 28 to 29 inches apart.
- Place a 28-1/2 inch armrest on edge at the end. The armrest should touch the ends of the legs. It should not be between the legs. Screw the armrest into place.
- Set the arm/leg unit upright, with the armrest upward.
- Place a 25-1/2-inch center brace between the legs at 14 inches high. Screw it into place, two screws at each end.
- Screw into a 25-1/2-inch seat connection brace between the legs. This brace will be positioned at a 90-degree angle to the previously installed center brace and below it. It must be flush with the edges of the legs since the seat platform will later be attached to it.
- Repeat all of the previous steps to build a second arm/leg unit.
Attach Seat Frame to Arm/Leg Units
Elevate the seat platform to 14 inches high on boxes or wood blocks. The end stringer on each side should match the height of the seat connection braces on arm/leg units.
From the inside of the seat platform, drive screws into the arm/leg units. Drive six screws per side.
Attach Seat Slats
Use 1-inch screws to attach the 11 one-by-twos lengthwise on the seat platform. Space the seat slats by 1/2-inch. You can use a spare one-by-two on-edge as a spacer template (the true size of one-by-two boards is actually 3/4-inch by 1-1/2-inch).
Attach Seat Back
The seat back consists of two 79-inch seat back two-by-fours (G) attached to the back of the arm/leg units.
From the back, stretch one of the 79-inch seat backs at the top, flush with the tops of the arm/leg units. Five inches down, screw the other 79-inch seat back onto the back of the arm/leg units.
How to Build the Sectional Add-On
-
Cut List / Parts List
Cut List
- 2 two-by-fours at 79 inches
- 2 two-by-fours at 72 inches
- 1 two-by-four at 28-1/2 inches
- 10 two-by-fours at 25-1/2 inches
- 1 two-by-four at 12-1/2 inches
- 11 one-by-twos at 72 inches
Parts List
Part # Lumber Length Function Quantity A Two-by-four 72 inches Seat platform front and back rails 2 B Two-by-four 25-1/2 inches Seat stringers 5 C Two-by-four 25-1/2 inches Legs, right 2 D Two-by-four 25-1/2 inches Leg, left-rear 1 E Two-by-four 12-1/2 inches Leg, left-front 1 F Two-by-four 28-1/2 inches Armrests 1 G Two-by-four 25-1/2 inches Center brace for right arm/leg unit 1 H Two-by-four 25-1/2 inches Seat platform connection brace 1 I Two-by-four 79 inches Seat back 2 J One-by-two 72 inches Seat slats 11 Build Seat Frame
To build the sectional add-on’s seat frame, duplicate the seat frame instructions from the sofa.
Build Arm/Leg Unit
To build the sectional add-on’s arm/leg unit, duplicate the arm/leg unit instructions from the sofa, with one exception: Build only one arm/leg unit. A second arm/leg unit is not needed because one side of the sectional add-on attaches to the sofa.
Attach Arm/Leg Unit to Seat Platform
Attach one arm/leg unit to the right side of the seat platform. Elevate the seat platform to help position it into place.
Add Legs to Left Side of Seat Platform
Screw the 25-1/2-inch left-rear leg (D) to the left side of the seat platform. Screw it into the seat platform from the left side. Keep the leg flush with the back rail of the seat platform.
Similarly, screw the 12-1/2-inch left-front support leg (E) to the left side of the platform. Do this from the left side. This leg will support a great deal of weight, so use four screws to attach it to the platform.
Attach Seat Slats
To attach the sectional add-on’s seat slats, duplicate the seat slats instructions from the sofa.
Attach Seat Back
To attach the sectional add-on’s seat back, duplicate the seat back instructions from the sofa.
Attach Furniture Connectors
- Slide the sofa and the sectional add-on together at a 90-degree angle, placing them in their final position.
- With the pencil, mark the on-center point where the sectional’s 12-1/2-inch front-left support leg touches the sofa’s front rail.
- Slide the two pieces of furniture apart.
- Attach one set of interlocking furniture connectors at the mark. Furniture connectors slide into each other. So, the connector on the sofa should be pointing up and the connector on the sectional should be pointing down.
- Add a second set of connectors on the tall legs of each furniture piece.
Completing Your DIY Outdoor Sectional
- Stain the wood, if desired, then apply a water-based polyurethane to seal the stain. Cedar can be stained and coated or left as-is.
- Decorate the outdoor sectional with fun, colorful seat cushions, 24-inch by 24-inch. Use large, soft pillows as backrests. Always look for cushions and pillows upholstered in polypropylene, acrylic, polyester, or other outdoor-safe, weather-resistant fabrics.
- Attach the sofa and the sectional add-on. To do so, lift the left side of the sectional add-on (you’ll need an assistant) and then slide the metal connectors into place.
Read the full article here


