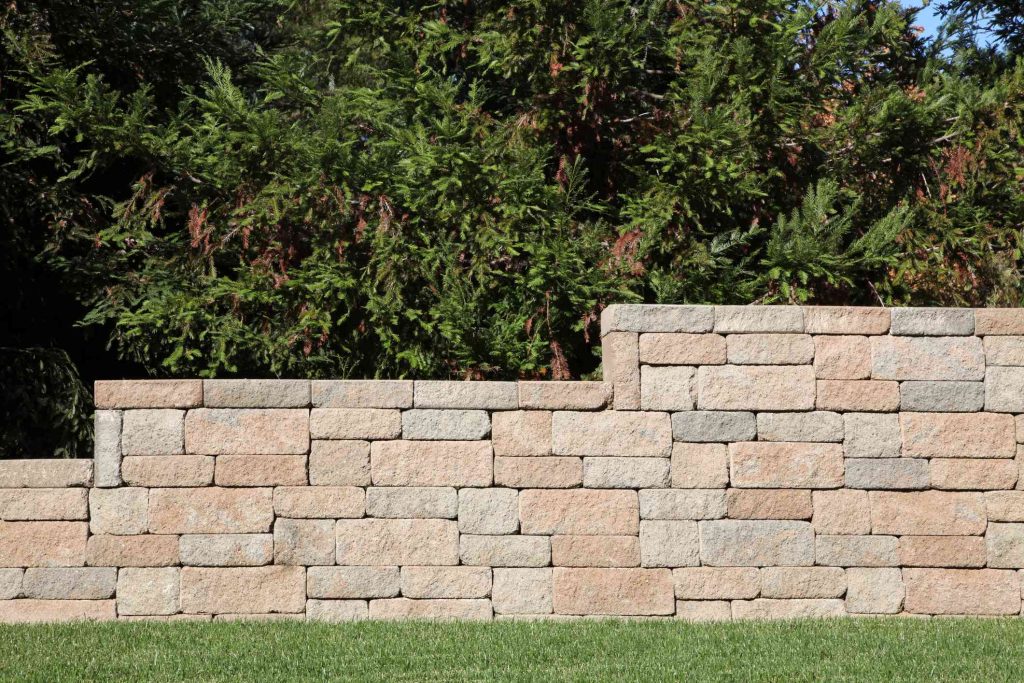
Slopes can create big challenges when building landscaping projects. Many structures, including sheds, walkways, gazebos, and patios, require flat surfaces. Even garden planting areas are much more effective if they are situated in flat areas of the yard. Building a retaining wall can offer a way to create and keep flat spaces for such projects. A retaining wall can also create a useful space in an area you once thought was unusable. If you are up for the labor, a retaining wall can be a DIY build. If constructed properly, your retaining wall can last for many decades. But if it’s not built right, it can buckle and cave in under the immense pressure of the soil behind it.
What to Consider Before Building a Retaining Wall
Retaining walls have structural requirements unlike that of any other landscape wall. That’s because the wall must hold back the earth which can exert thousands of pounds of force. Consider the following when deciding to build a retaining wall:
- Building material options: Concrete blocks are easier for beginners. Build retaining walls from cinderblocks, concrete blocks, bricks, boulders, and stacked stone. For simple and small walls, use wood or vinyl fencing.
- Drainage: A tall retaining wall may need to have a built-in drain pipe or other features to shed water and lessen the pressure on the wall.
- Materials to fill the space: Soil becomes heavier when it’s saturated with water. For this reason, the space behind a retaining wall is usually filled not with soil, but with a porous, drainage-promoting material such as gravel or sand.
- Designing the wall with a setback: Concrete retaining wall blocks are shaped in a way that creates a natural setback as the blocks are stacked. A lip on the back of each block creates a uniform setback as each course is added. This design causes the wall to angle slightly back into the slope, further improving its holding power.
- When to build: A retaining wall is best constructed when the soil is dry after a period of no rain. Wet earth is both hard to shovel into and hard to move.
Codes and Regulations
In many communities, retaining walls are among those landscape structures that require a building permit. Retaining walls may fall under zoning restrictions that dictate proximity to property lines, maximum height, and other conditions. Consult your local permitting department for advice; not all communities require building permits for a retaining wall. In some communities, no permit is required if the retaining wall remains lower than 4 feet and is not located in an environmentally critical area.
Where permits are required, the retaining wall must be constructed using sound building practices and cannot damage or pose a direct or indirect risk to neighboring properties. For example, you’ll be restricted from cutting back into a slope and building a retaining wall if the structure could potentially undermine land that extends into your neighbor’s property or affects drainage patterns on their land.
Choosing a Location
There are two ways a retaining wall can be used to create flat space. To create a flat area in front of the wall, the process involves cutting back, or notching into the slope, then building a retaining wall to hold back the remaining hillside behind the wall. This is often the method used where the slope is quite steep.
Alternatively, you can build the retaining wall, then fill in the space behind it. This method is often used on gentle slopes, where you want to interrupt the slope with a tier of flat garden or lawn.
There’s a lot to consider when choosing a location for a retaining wall. Here’s what to look for when deciding whether the location where you want the wall will work:
- A sloped area where runoff is causing soil erosion
- A spot where the wall can “lay back” into the retained soil vs. true vertical placement, which makes the wall more stable
- A place where there is a portion of undisturbed soil behind the wall where anchors can be inserted for stability
What You’ll Need
Equipment / Tools
- Tape measure
- Flat shovel
- 2- or 4-foot level
- Masonry chisel
- Small sledgehammer or framing hammer
- Work gloves
- Eye protection
- Hearing protectors
Materials
- 35 retaining wall blocks, 4×8 1/2 inches
- Coarse sand or gravel
Instructions
Our sample project shows the construction of a very simple four-course retaining wall, such as you might build to flatten a slope to create a small patio or walkway. Your own retaining wall might be shorter or taller, longer or narrower, depending on your needs. Adjust your material quantities as necessary.
-
Level the Ground
- Measure and lay out the position of your retaining wall on the building site.
- With a flat-blade shovel, remove soil and level the area where the retaining wall will be built. In some cases, this will involve major excavation as you cut back into the hillside to establish a flat space, while in other cases you will create just a narrow flat trench where the bottom row of blocks will sit. Strive for a flat, level, and compact surface for the bottom row of retaining wall blocks to rest.
- Use a short 2×4 as a screed, scraping off soil using a sawing motion to create a level surface.
- Use a long 2×4 with a level on it to check a wide surface to make sure it is level.
-
Lay the Base
A retaining wall will be most stable if it is built over a porous base. The porous layer will help with drainage on the completed wall and will also make it easier to level the first row of blocks.
- Spread a 2-inch layer of sand or gravel over the area where the first row of blocks will be laid.
- Use a long 2×4 and level to smooth and even out the base layer.
- Retaining walls taller than four blocks high will generally require the base to be compacted with a hand tamper before proceeding.
-
Set the First Block
- Beginning at one end of the wall, set the first block into the base layer.
- Press it firmly down, though not so hard that you squeeze the base layer away.
- Use a level to check this first block for the level in both directions: from side to side and from front to back.
-
Complete the First Course of Blocks
- Lay the next adjoining block, and again use a 2×4 and level to make sure it is flat and perfectly aligned with the first block. Aligning from block to block in this first row is very important; as you continue to add courses of blocks upward, any differences between lower blocks will be transmitted to upper courses, often in disastrous ways.
- Continue with subsequent blocks to complete the first course of the wall.
- Check after each block to make sure the row remains level and aligned with your desired layout. Retaining wall blocks have angled sides that allow for gently curved walls if you desire.
-
Set the Next Course
Subsequent rows of blocks are installed using a “running bond” brickwork pattern, in which the seams on adjoining courses are offset by one-half block. This type of pattern will be considerably stronger and more stable than vertically aligned seams (known in the trades as “stack bond”).
Install all full blocks for the second course before cutting and fitting the half-width end blocks on the ends.
-
Cut the Half Blocks
The half blocks at the end of alternating rows can be cut using a masonry chisel and hammer. Retaining wall blocks have a V-notch groove on the backside to allow the blocks to easily cleave in half.
- Stand the block upright, face down, then position the tip of a broad masonry chisel into the groove.
- Strike sharply onto the end of the chisel to split the block into two pieces.
- You may need to strike several times for the block to break.
- A hand maul is the best tool for hitting the chisel, but a framing hammer will also work.
-
Set the Half Blocks
At the end of each alternating course, use half blocks to complete the row. Where possible, face the rough cleaved surface outward, so it faces into the adjoining soil.
-
Check Each Course for Level
As each row is completed, double-check for level.
- For a short wall, it’s sufficient to use a 2- or 4-foot carpenter’s level to check two or three adjacent blocks at a time.
- For long walls, the best way to check is to drive stakes at the end of each wall, then use a long string with a string level attached to create a reference line as you install each course of blocks.
-
Check the Back Side of the Wall
- When building a retaining wall, you need to provide ample space between the back of the blocks and the earth behind the wall. This space is also necessary to provide an area for backfilling with porous sand or gravel. As each course is completed, check this space.
- You may need to excavate additional soil to accommodate the increased setback of the blocks as the wall grows higher.
-
Backfill Behind the Wall
- When the wall reaches its completed height, carefully fill in the space behind the wall using sand or gravel. It is very important to use a porous material for backfill, as it will allow water to easily drain away, lessening the weight and force placed on the wall during heavy rains. Ordinary soil can be far too dense, creating an enormous weight that puts dangerous stress on the wall.
- The wider the backfill area with gravel or sand, the better your wall will drain. If you wish, you can leave the drainage backfill slightly lower than the top of the wall, then fill the remaining space with topsoil for planting grass or other plants.
- Portion out the backfill material in small amounts to let the material settle. If you shovel in too much at once, you may create hollow spaces in the backfill that can compromise the wall’s stability.
- Occasionally rake or shift the sand with the shovel to coax the backfill material into settling. The more compact the backfill, the more stable your wall will be.
When to Call a Professional
A concrete block retaining wall under 3 feet tall can be a good DIY project, but any taller wall requires the services of retainer wall contractors. A professional has the knowledge, experience, and equipment to handle the enormous labor necessary to complete the job. A professional will also understand local building codes and if your area is especially prone to erosion and runoff problems. If you have an existing retaining wall that needs repair because it is leaning or caving in, a professional will be better equipped to understand why the fail happened and how to best solve the issue.
Read the full article here


