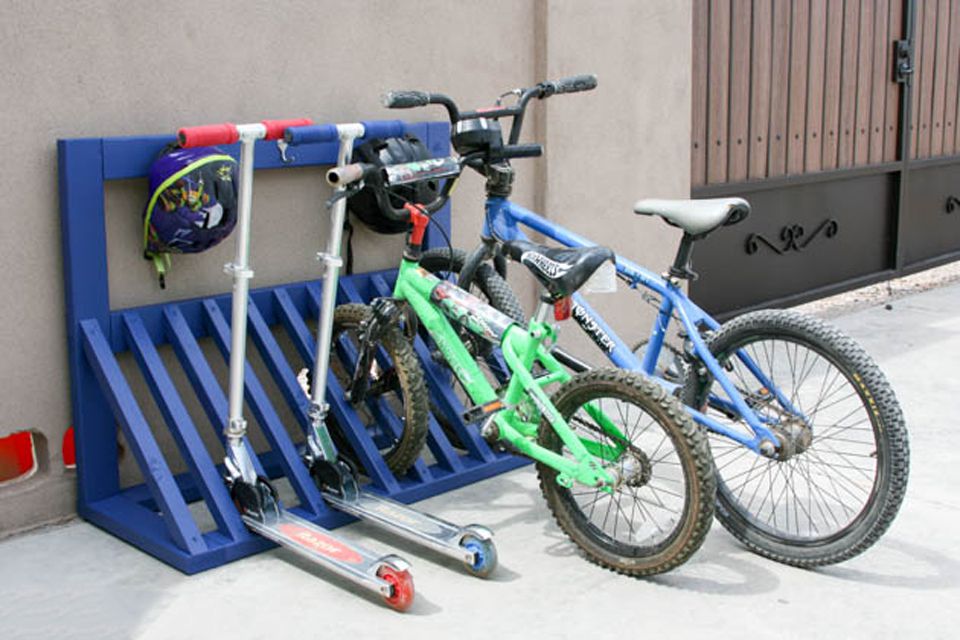
Building a DIY bike stand is the best way to keep bikes organized, ensuring your lawn, driveway, and garage stay clutter-free. Let’s face it—though bikes are nearly always fitted with a kickstand, they’re still an awkward, space-hogging storage nightmare. Keeping them in a tight, organized bike rack can reclaim your garage’s floorspace or even improve your lawn’s visual appeal, as this DIY bike stand design can easily be customized to withstand the elements.
This bike stand is so quick and easy to build, you’ll have plenty of time left to teach your kids to use it.
Before You Begin
Before you set out to buy materials for a DIY bike stand, you should first tally up the number of bikes you want to store. Our design is made to accommodate around five bikes while leaving a few open slots for scooters and skateboards. However, you can easily make this design wider or narrower to better suit your space and storage needs.
How to Make Your DIY Bike Stand Outdoor-Ready
The other thing you should consider before buying materials for a DIY bike stand is whether or not you plan to use it outside, as this tutorial utilizes standard pine lumber, which won’t handle exposure to the elements long term. If so, substitute traditional lumber for pressure-treated lumber and opt for an outdoor-rated staining sealant that works on pressure-treated lumber.
What You’ll Need
Equipment / Tools
- Miter saw
- Measuring tape
- Pencil
- Drill
- Screwdriver bits
- Drill bits
- Speed square
- Orbital sander
- Painting supplies (optional)
- Staining supplies (optional)
- Safety glasses
- Dust mask
Materials
- 5 8′ x 2×4 pine boards
- 3 8′ x 2×2 pine boards
- 8′ x 2×10 pine board
- 3″ self-driving wood screws
- 2-1/2″ wood screws
- 120-grit sandpaper pads
- Wood stain (optional)
- Clear sealant (optional)
- Primer (optional)
- Paint (optional)
- Wood filler (optional)
- 5 Screw-in plant hooks
Instructions
How to Build a Bike Stand
Follow the steps below to build your DIY bike stand. If you plan to alter the dimensions, don’t forget to do so when cutting your lumber.
-
Cut Boards for Base
For the base of the bike stand, cut two 2x4s measuring 48 inches and 11 2x4s measuring 24 inches.
-
Measure and Mark the Wood
On one 48-inch piece, measure from the end over 6 inches and make a mark. Then continue to make marks every 4-1/2 inches until you’ve made 9 marks total. Place the second 48-inch piece alongside the first and transfer the marks to the second board by laying a speed square over the two boards and tracing the lines.
-
Assemble the Base
Mount the 24-inch boards between the two 48-inch boards, centering their ends on the marks. If it helps in aligning the boards more precisely, mark the center of each board’s end beforehand. Screw through the 48-inch boards into the ends using two 3-inch self-driving wood screws for each side of each board. Position the remaining two boards flush at each end.
-
Cut and Attach Vertical Side Pieces
Cut a 2×4 into two 36-inch pieces. Place each 36-inch board on each side, positioned against the back of the base. Using a speed square to ensure the boards are plumb, screw through each board into the base with three 3-inch wood screws.
-
Cut and Attach Horizontal Brace
Cut a 2×4 to 48 inches. On the front, inside corner of each vertical side, measure up 10-5/8 inches from the top of the base and make a mark. With its 1-1/2-inch side facing upward, place the horizontal piece in-between the two sides with its bottom edge against the marks. Screw through the sides into each end with two 3-inch wood screws
-
Cut and Attach Shelf
Cut a 2×10 to 51 inches and place it on top of the vertical boards, flush with the back. Screw through the top into the verticals with two 3-inch wood screws.
Warning
This shelf is meant to be light-duty and hold things like helmets, balls, and other sports equipment. If you plan to store more substantial items, consider adding a heavy-duty L-bracket beneath the front of the shelf.
-
Cut and Attach Dividers
For the dividers, cut 11 2x2s into trapezoids with 45-degree angles on each end. The long side of each board should measure 20 inches. Place the boards on top of each base divider and against the back horizontal brace. Screw the board in place using one 2-1/2-inch wood screw in each end. To avoid splitting, drill pilot holes beforehand.
-
Sand the Wood
Sand all wood surfaces using an orbital sander fitted with 120-grit sandpaper.
-
Finish the Wood
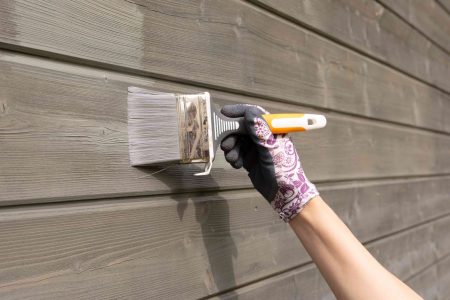
For indoor use, simply stain and apply a clear sealant to the wood. If you prefer to paint it rather than stain it, be sure to prime the wood using a raw wood primer beforehand.
For an ultra-smooth finish, countersink the screws and hide each screw head with wood filler before sanding. If you plan to use the bike stand outside, make sure you choose finishes rated for exterior use.
-
Add Hooks
Beneath the shelf, drill pilot holes and add screw-in plant hooks for hanging bike helmets and accessories.
How to Customize Your DIY Bike Stand
While this bike stand is an organization game-changer as is, a little bit of customization can make it much more effective for your specific use. Consider some of the following modifications:
- Add more shelving above it for increased storage.
- Mount locking casters on each corner to easily wheel it in and out of the garage.
- Add wooden sides to the shelves to create a catch-all for balls and other sports equipment.
- Adjust the divider spacing to accommodate thinner or thicker bike tires.
- Add coat hooks to the side of each vertical piece for additional storage.
- Add a bike lock for secure outdoor storage between play sessions.
How to Maintain Your DIY Bike Stand
After all your hard work, it’d be a shame for your creation to only last one or two seasons. To ensure your DIY bike stand lasts for years to come, stay on top of resealing or repainting the wood as needed, depending on which finish option you chose.
Read the full article here


