Repointing brick extends the life of siding, walls, and chimneys by removing old mortar and replacing it with new mortar.
Repointing brick is an inexpensive brick update that helps you avoid costly repairs in the future. The project is DIY-friendly, though labor-intensive, and requires only basic tools and mortar.
What Is Repointing Brick?
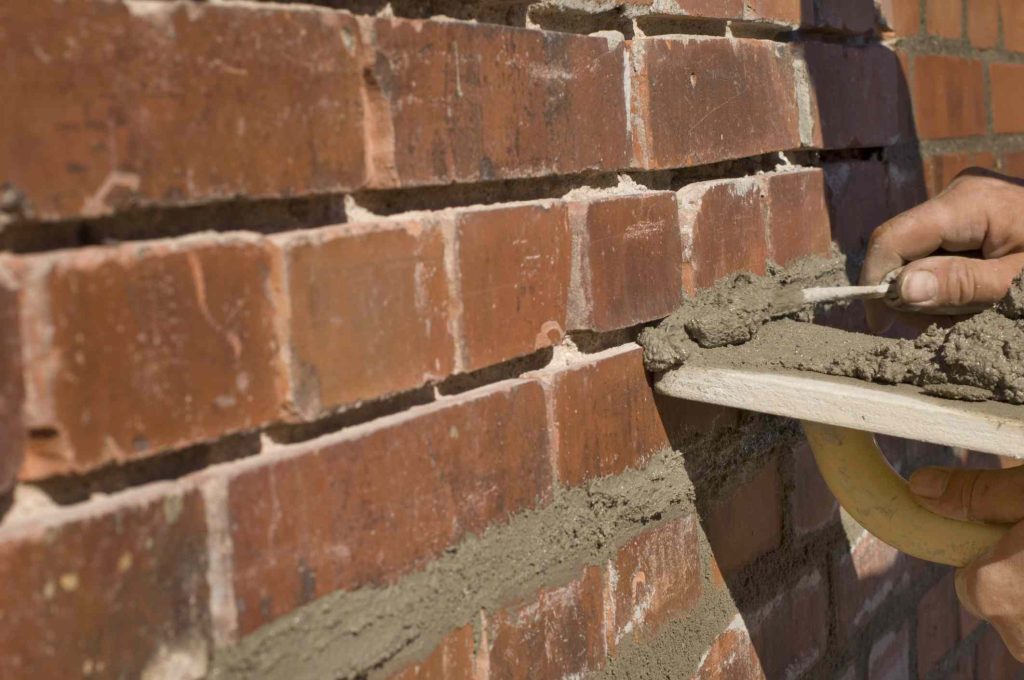
Pointing brick means adding mortar to joints between bricks during installation. So, repointing brick means repairing previously installed brick by removing old mortar and replacing it with new mortar. Repointing brick is also called tuckpointing.
When to Repoint Brick
Repointing brick should be done when you see any of these conditions with your exterior brick’s mortar:
- Crumbling
- Holes
- Cracks
- Erosion exceeding 1/4-inch
- Separation from bricks
Safety Considerations
Wear safety glasses and a dust mask when raking and brushing the mortar. Wear gloves with fresh mortar because the hydrated lime in the mix is caustic to the skin.
What You’ll Need
Equipment / Tools
- Wheeled joint raker
- Masonry brush
- Hawk board
- Hammer
- Wire brush
- Tape measure
- Large bucket
- Garden hose attached to faucet
- Cloth drop cloth
- Safety glasses
- Dust mask
Materials
- Type O mortar
Instructions
How to Repoint Brick
Before you repoint brick, make sure that the outside temperature is and will remain at the mortar’s specified temperature range for another two to three days. This range is typically between 40°F and 100°F, but be sure to check with the instructions on the bag.
-
Protect Surfaces
Cover the ground in front of the brick with a drop cloth.
-
Determine Mortar Depth
Measure the width of the vertical brick joints. You’ll need to remove mortar as deep as twice the width of the vertical brick joints.
Brick Joint Width Mortar Removal Depth 1/4-inch 1/2-inch 3/8-inch 3/4-inch 1/2-inch 1-inch Adjust the Raking Tool
Set the pin on the wheeled skate-style raking tool to the desired mortar removal depth.
Rake the Vertical Joints
Rake the vertical joints first, starting at the top and working downward. Occasionally, brush out the joints with the masonry brush so you can see the brick.
Rake the Horizontal Joints
Rake the brick’s horizontal joints, starting at the top and working down. Frequently sweep out the joints with the masonry brush.
Brush the Joints
Brush any joints that have remaining mortar with the wire brush. It’s not necessary to brush all of the joints—only joints that still have stray pieces of mortar.
Clean the Brick Joints
Clean the brick joints thoroughly with the masonry brush.
Mix the Brick Mortar
Mix the mortar with water in the five-gallon bucket to a smooth, workable consistency similar to peanut butter.
Add Mortar to the Joints
First, fill the long, continuous horizontal brick joints. Place a fist-sized amount of mortar on the hawk. Spread out the mortar on the hawk. Hold the hawk so that it is just below the horizontal joint and touching the brick below the joint. With the pointing trowel, slide the mortar into the joint and tamp it into place. Follow by filling in the shorter vertical joints.
Let the Mortar Rest
Leave the mortar for about 30 to 45 minutes to partially dry. Test by pressing the mortar with your finger. If your finger does not leave a depression, the mortar is ready for repointing. Do not let the mortar completely dry out.
Strike the Joints
Strike the brick joints by running the edge of the margin trowel across the brick to remove extruded mortar.
Repoint the Vertical Joints
Starting with the vertical perpendicular sections, press the pointing trowel into the mortar. Slide the trowel to smooth and compress the mortar. Do this for all vertical joints.
Repoint the Horizontal Joints
Repoint the horizontal mortar courses similar to the vertical joints. Slide the pointing trowel along the mortared joints, compacting and shaping the mortar.
Brush Away Excess Mortar
With the masonry, brush away excess mortar from the face of the brick. Go easy to avoid digging into the newly repointed mortar between the bricks.
Cost of Repointing Brick
The cost of repointing brick ranges from $4 to $17 per square foot when a mason does the project. The cost to repoint brick on a 100-square-foot area starts at $400 and ranges up to $1,700.
The cost of repointing brick by yourself is about $0.50 per square feet. The cost to DIY repoint brick on a 100-square-foot area is around $50 to $75.
Type O mortar costs about $10 per 80 pounds, a quantity capable of repointing 35 to 40 square feet of brick, with 3/8-inch-width joints filled to a depth of 3/4-inch.
When to Call a Professional
Repointing brick isn’t complicated, but it is labor-intensive. Masons have the tools and expertise needed to repoint large areas of brick. They also have scaffolding and fall-arrest gear for working on high areas like chimneys.
Tips for Repointing Brick
- Work in small sections to avoid mortar drying prematurely.
- Mist the brick with the garden hose to hold down dust.
- Be careful not to chip or gouge the brick.
- Reset the raking pin frequently to maintain raking depth.
FAQ-
Can you repoint brick yourself?
You can repoint brick by yourself. It’s essential to buy the right tools, including a wheeled joint raker, trowels, and a hawk board. Repointing brick by yourself saves a considerable amount of money over hiring a mason to do the project, but it is slow work.
-
How often should brick be repointed?
Brick should be repointed when the mortar is failing; that is, when the mortar is crumbling, missing, shows holes, has weeds or vines growing through it, or when it is separating from the brick. Generally, brick should be repointed every 30 to 50 years.
Read the full article here


