Linoleum is a distinctive floor covering that many homeowners try to preserve to maintain their home’s vintage look and feel. Waterproof and incredibly tough, linoleum behaves much like vinyl flooring—yet it contains no plastics. Not only that but linoleum is natural and biodegradable.
But even the best linoleum will reach the end of its lifespan. That’s when it’s time to remove the linoleum flooring and replace it with laminate, vinyl, tile, or other durable flooring products. Removing linoleum flooring is a painstaking process but it can be done with enough time and determination.
What Is Linoleum?
Linoleum is a sheet or tile floor covering made from linseed oil, tree rosins, stone, cork, and wood flours, pigments, and burlap or felt. Linoleum’s popularity peaked between 1946 and 1956. It was commonly used from the 1920s to the early 1960s.
How to Know if You Have Linoleum or Vinyl Flooring
Linoleum and vinyl flooring are sometimes confused with each other. It’s important to determine if you have linoleum or vinyl flooring because sheet vinyl is easier to remove.
-
Thick
-
Heavy
-
Brittle
-
Burlap or felt backing
-
Felt liner (underlayment)
-
Does not melt
-
1920s to 1950s
-
Thin
-
Lightweight
-
Soft
-
Soft backing or none
-
No underlayment
-
Melts under heat
-
1950s to today
Why Linoleum Is Difficult to Remove
Linoleum is difficult to remove for several reasons: aggressive adhesives, felt or burlap that mix with the adhesives, and the possibility of asbestos in the linoleum glues.
- Adhesives: Linoleum is always glued down. These adhesives, often decades old and rock-hard, form a solid bond between the linoleum and the subfloor.
- Backer and Liner: The linoleum has burlap or felt bonded to the back of the product. In addition, linoleum was often installed on top of a felt liner, similar to underlayment used with laminate flooring today. These multiple layers of felt and burlap combine with the adhesive to form a thick flock that bonds to the flooring below.
- Asbestos: Adhesives used with linoleum may contain asbestos. If you detect asbestos, do not mechanically abrade the flooring or adhesive.
Options for Removing Linoleum Flooring
Remove Linoleum With Dry Ice
With temperatures ranging down to -100°F, dry ice freezes linoleum and its adhesive super-cold, until they loosen and can be chipped off fairly easily. This method has been used for decades.
Because dry ice melts into a vapor, not liquid, it will not harm the hardwood flooring underneath. Removing linoleum with dry ice works best for linoleum tiles. It’s a cleaner method than using a floor scraper but it’s slow and tedious.
Scrape and Grind Away Linoleum
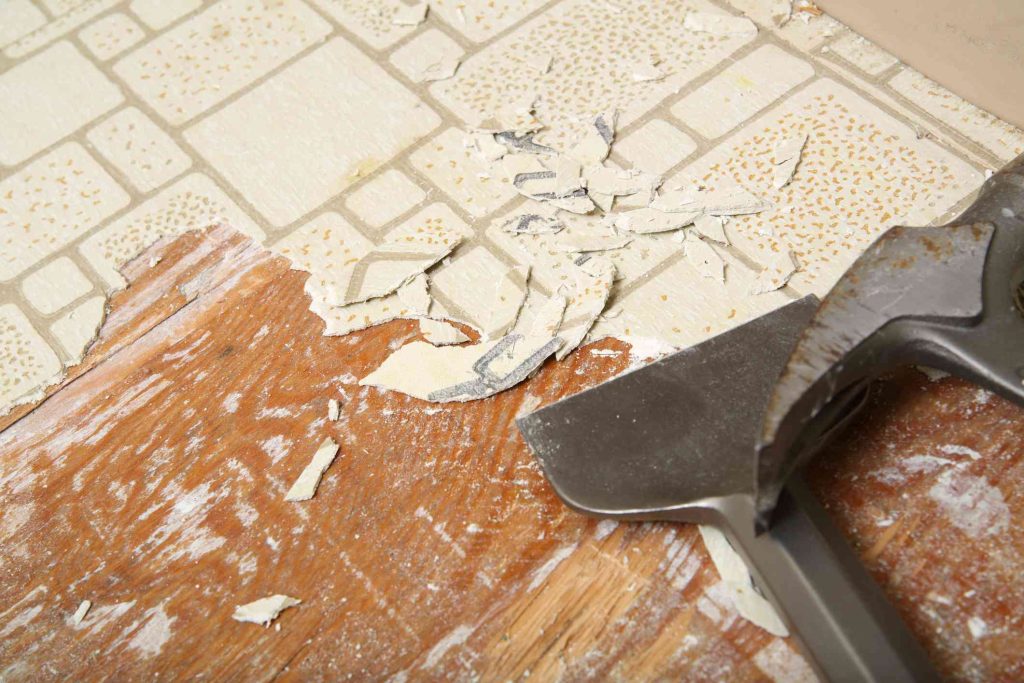
Linoleum can be scraped off with a prybar or flooring scraper, without using dry ice to loosen it. Because not all sections of the linoleum or adhesive come off, the remainder can be ripped off with a flooring drum sander.
This method works best for sheet or tile floor linoleum. It’s messier than using dry ice to loosen the flooring, but it is much faster.
Cover the Linoleum
Unless you have a compelling reason for removing the linoleum flooring—like refinishing hardwood flooring underneath—it’s worth considering covering up the linoleum.
Linoleum is thin enough that it can usually be covered with a floating floor like laminate or luxury vinyl floor.
Safety Considerations
Test the linoleum adhesive for asbestos with a test kit or call a testing company.
Dry ice is carbon dioxide in a solid state. So, when dry ice melts, it emits carbon dioxide. If enough carbon dioxide builds up in a confined space, there is the possibility of suffocation. Open all windows and doors to ventilate the room and bring oxygen into the room.
Do not eat or drink dry ice. Do not touch dry ice with your bare hands. Wear safety glasses.
What You’ll Need
Equipment / Tools
- Flooring drum sander
- Flooring orbital sander
- 120 grit drum sander sandpaper
- Floor scraper
- Pry bar
- Eye, hearing, and breathing protection
- Shop vacuum
- Insulated gloves (for dry ice only)
Materials
- Dry ice
- Sheet plastic
- Old towels
- Asbestos test kit
Instructions
How to Remove Linoleum With Dry Ice
-
Test for Asbestos
Use the asbestos test kit as directed before starting work on a linoleum floor. If your flooring tests positive for asbestos, stop the project and call a professional to advise on next steps. Working with asbestos is possible for DIYers, but you must be sure of what you’re doing.
-
Purchase and Prepare Dry Ice
Buy the dry ice just before you are ready to remove the linoleum. Dry ice will not keep solid in a freezer, though a freezer will slow shrinkage somewhat. Buy dry ice at a sporting goods store or large grocery. Handle dry ice with insulated gloves.
Ventilate the Room
Open up windows and doors to bring oxygen into the room.
-
Cover the Linoleum
Start at an edge of linoleum. Cover an area of linoleum about 2-feet square (24 inches by 24 inches) with plastic. Place ice on the plastic to cover an area about 1-foot square, leaving a border around the ice. Cover the ice with a couple of old towels.
-
Wait for the Linoleum to Freeze
Let the dry ice freeze the linoleum for about two to three minutes.
-
Move the Dry Ice
Grab the edge of the plastic and slide the dry ice away to the adjacent tile.
-
Pry Off the Linoleum
While the dry ice is freezing the next section, force the pry bar under the edge of the previous linoleum section. Pry up. If removing sheet linoleum, pry up as much of the linoleum as you easily can.
-
Move to the Next Area
Repeat the process on the next area of linoleum.
-
Sand Off the Remainder
After the linoleum has been removed, remove the remainder of the floor adhesive, felt, and burlap with an orbital floor sander.
How to Remove Linoleum With a Scraper and Sander
-
Scrape Off the Linoleum
Begin at the edge of the linoleum. Remove floor transitions if needed. Place the flat end of the floor scraper under the edge of the linoleum. Push forward and pry up.
-
Continue Scraping the Linoleum
The linoleum may sometimes come up in entire tiles or in large sections but generally will break off in small pieces just a few inches in diameter.
-
Grind Down the Large Pieces
Large chunks of adhesive and small pieces of linoleum that were not removed with the pry bar or floor scraper can be ground down with the drum sander. Start with heavy grit sandpaper, even down to 36 grit sandpaper, if needed.
-
Sand With Orbital Sander
For fine finishes, switch to the orbital sander with finer grit sandpaper.
Tips for Covering Linoleum
If you decide to cover up the linoleum instead of removing it, follow these tips for a flatter floor covering and smoother transitions.
- Covering the linoleum will raise the floor above that of adjacent floors. Floor reducer strips can fill the seam and ease the transition between the covered linoleum and adjacent floors.
- Almost any loose-lay or glue-down flooring can go over linoleum: laminate, sheet vinyl, tile or plank vinyl.
- You’ll need to remove all baseboards and then re-install them higher to accommodate the multi-layered flooring.
- Undercut door casings with an oscillating multi-tool or a manual pull saw.
When to Call a Professional
If the linoleum adhesive contains asbestos, call an asbestos abatement or remediation company.
Even if you know how to remove linoleum flooring, you may still decide to call a professional since it is a difficult project. Call a general contractor or a large, full-service flooring company.
If the linoleum was cemented directly to the lower floor without felt liner, the linoleum will have developed an exceptionally tight bond to the wood. Chipping away the linoleum may splinter and severely damage the floor underneath. A professional can help remove the linoleum with a minimum of damage to the lower flooring.
Read the full article here


